Download
1 variant available


The FLUX.1 [dev] Model is licensed by Black Forest Labs. Inc. under the FLUX.1 [dev] Non-Commercial License. Copyright Black Forest Labs. Inc.
IN NO EVENT SHALL BLACK FOREST LABS, INC. BE LIABLE FOR ANY CLAIM, DAMAGES OR OTHER LIABILITY, WHETHER IN AN ACTION OF CONTRACT, TORT OR OTHERWISE, ARISING FROM, OUT OF OR IN CONNECTION WITH USE OF THIS MODEL.
My primary focus is on converting pixel art from vintage games into realistic renderings. I haven't tested other types of pixel art (my training set consists entirely of vintage games and my own fan art). My goal is to recreate the look and feel of the original image as closely as possible while maintaining realism (this is just my personal opinion, of course). Take this Carol (from the arcade game "Commander") for example: she exudes both beauty, sexiness, and a muscular build. This isn't something you can simply achieve by dressing a realistic character in a bikini or leather jacket.
Now, with the excellent capabilities of Kontext and the fine-tuning of Lora, we can accomplish 70-90% of this task. Currently, creating (what I consider to be) excellent realistic fan art still requires 10-30% of manual adjustments.
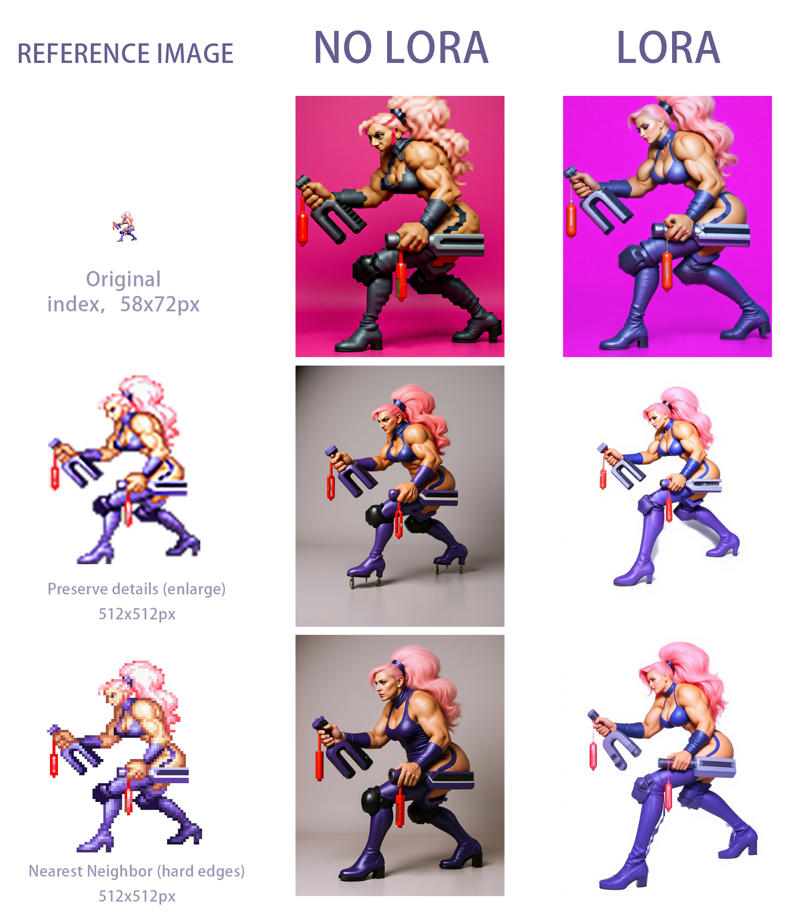 While the image above is fairly self-explanatory, I'll provide a few clarifications.
The original image's transparent channel is purple in indexed color, so the Kontext image has a slightly photographic and figurine-like texture. This LoRa will try to adhere to the original image's color scheme, even if it doesn't appear natural.
Even with a 58x72 pixel original image, this LoRa produces good results (the impact of upscaling the original image is significant compared to using LoRa). However, if possible, upscaling the original image to around 512 pixels will yield even better results, and the effect will be noticeable.
The so-called "convert to RGB first, upscaling later" refers to the original image being an 8-bit pixel image, and the upscaling option is set to "Preserve Details (upscale)" by default. This upscaling doesn't require a dedicated procedure; simply add a node to your workflow.
The so-called "upscaling first, convert to RGB later" yields the same effect as the "Nearby (hard edges)" method, and this upscaling method produces the best results. (This is highly dependent on the training set and may not apply to LoRa trained by others, so please keep this in mind.)